Tuesday, August 28, 2012

Top 10 Pins of the Week

If you have followed my blog at all, you may already know how much I have fallen in love with Pinterest.  I get a ton of great ideas from there and could easily waste an hour looking at everything.  I wanted to try something new, and each week I will share some of my favorite things I found thanks to Pinterest.  

Below are all my favorite things from this week and the link to where they came from.  

1. This Bedroom.  I am pretty sure I want my next Master bedroom to look just like this!  I LOVE the colors... light blues and white with a hit of tangerine and dark wood.  I am in love with those reclaimed pieces of wood on only the top part of the wall.


MASTER BEDROOM... I LOVE this!!

2. Spray painted metal folding chairs.  What a fun idea!  I don't actually own any metal folding chairs, but this makes me want to get some... maybe at a thrift store or garage sale?!

Source: Manuel's Flickr (it's in French, but I don't need to speak the language to love the idea!)

spray paint old metal folding chairs. LOVE!

3.  Scrabble names on the wall.  What a fun idea for a family game room!  Spell everyone's name out in large Scrabble pieces and hang them on the wall!

Source: Remodelaholic

Family Scrabble Decor for the game room~  LOVE this idea!!!

4.  Fun food packaging.  I just found this website and I love it!  They have tons of different packaging for edible gifts!  I have my eye on these ice cream or soup containers.  They packaged cookie dough in one to give as a gift so you can bake your own cookies.  Not only do they sell the packaging, but they sell it in any quantity.  They don't make you buy a whole case of something that you really only want a few of.  Makes it great for the home baker or occasional food gift giver.  Plus, they also have a blog with lots of fun ideas of how to use their products!

Source: Shop Garnish
i am going to revamp my christmas baking baskets this year! this is the best website for cool packaging ever!
5.  Gotta love this dog picture.  The picture and quote says it all.  I have a dog and I love this.  Haha

Source: unknown

oh good, you're up. > yep, I'm familiar with this one. lol

6. Luke Bryan.  Again... I don't have anything else to say.  Love him and love his newest album Tailgates and Tanlines (which I am listening to as I type this!).  

Source: unknown

:-)

7.  White Chocolate Cream Cheese Danish Braid with Apples and Walnuts.  I WANT TO MAKE THIS!  Yummy!!

Source: Doughmesstic

White Chocolate Cream Cheese Braid.

8.  Family Cookbook. I made a family cookbook for all the women in my family when I was in college.  I secretly collected everyone's favorite and signature recipes, and then typed up all the recipes and made cookbooks for everyone as gifts.  This takes it to the next level!  She included her family's favorite recipes and pictures and made it on the website Blurb (where you can make your own books too!).  I also love reading her blog, so make sure you check it out!  


\Make your own cookbook with Blurb - add your own family photos and recipes

9.  Framed Cork Boards.  School is just starting and what a great way to display artwork and school work!  It's super simple.  Find old frames... at the thrift store, a garage sale or on sale and spray paint whatever color(s) you like.  Then cut cork board to fit (which they sell at craft stores in rolls) and ta da!  


Great idea! Frames filled with cork board for kids artwork and writings (Totally doing this for the nursery!)

10. Target.  Umm... this happens to me every. single. time.  Haha!  

Source: unknown

Haha!  So true!

These are my favorite pins of the week!  They are either things I want to make or bake, dream rooms or things that simply made me smile!  

Look for my favorite pins of the week next week!  

You can always check out my Pinterest and see what I have been pinning lately!  ;-)

Have a great day!!


Tuesday, August 21, 2012

Pineapple Upside Down Cake


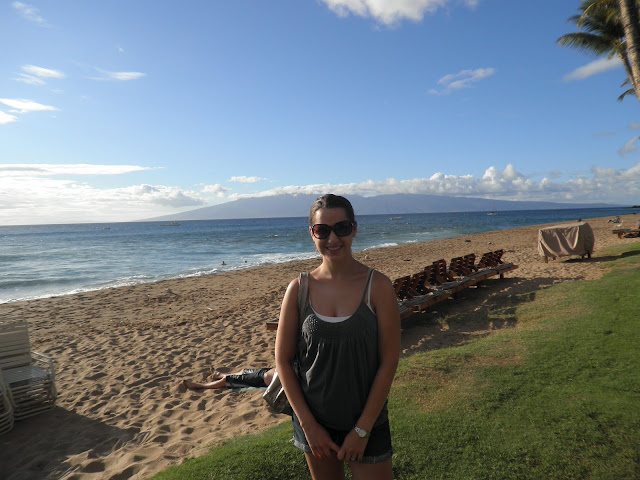
It has almost been a year since I went to Hawaii with some girlfriends.  What a great trip!  A whole week of friends, the beach, bikinis, yummy food in the most scenic location.  We didn't do a ton of touristy things like sightseeing and going on tours.  It was a really relaxing and nice vacation.  Especially considering I don't get to see my really good friend, who I've been friends with since middle school, too often!  


My friend works at a hotel and won Employee of the Year, and got a free trip to any of their hotels.  She picked Maui, and I was just lucky enough to go with her!  The hotel had the best food.  I love breakfast food and this place did not disappoint.  The big buffet had so many different options of all the breakfast foods you could imagine with tropical twists, such as guava pancakes.  Yummy!  It was quite pricey, so we didn't eat there every morning.  Down by the pool and beach, they had a mini buffet that had pretty much the same stuff, but at the beach bar so it was about half the price.  So, after we would pick up clean towels for the day and reserve our chairs, we headed to breakfast.

This beach bar also had lunch, desserts and other snacks for during the day.  One of my favorite things was their Pineapple Upside Down Cake.  It's a very traditional dessert, but it was delicious and it probably didn't hurt that I was enjoying it in Hawaii.  

Ahhh... I wish I was still there!

Recently, I have been in the mood for Pineapple Upside Down Cake, so I made some and I want to share it with you!  


Pineapple Upside Down Cake

Ingredients:
  • 2 oz. butter
  • 6 oz. brown sugar
  • 4 pineapple slices, canned
  • about 6 maraschino cherries
  • 4.25 oz. buttermilk
  • 2.25 oz pineapple juice, from the can of pineapple slices
  • 2.5 oz. vegetable oil
  • 1 tsp. vanilla
  • 3 eggs
  • 8 oz. cake flour
  • 5 oz. sugar
  • 1 tsp. baking powder
  • 1/4 tsp. baking soda
  • 1/2 tsp. salt
  • pinch nutmeg
  • 1.5 oz. shredded coconut
Directions:
  1. Preheat oven to 350°.
  2. Melt butter and brown sugar in an 8 inch deep cake pan over the stove.  (pictured below)
  3. Once melted, pull off heat (be careful... it may be hot!) and arrange pineapple slices and cherries in desired pattern.  Set aside.
  4. In medium bowl, combine buttermilk, pineapple juice, oil, vanilla and eggs.
  5. In large bowl, sift together flour, sugar, baking powder, baking soda, salt and nutmeg.  
  6. Pour the wet mixture into the dry and whisk until combined.  Mix in coconut.
  7. CAREFULLY pour batter over fruit.  Caution:  fruit may shift a little when you add the batter. 
  8. Bake for 35 minutes or until a knife comes out clean.  
  9. Cool 30 minutes before flipping upside down. 
  10. Use spatula to loosen edges before turning onto a cake plate.
  11. Enjoy warm or at room temperature.  


Place the cake pan right on the stove.  Doesn't matter if its an electric or gas stove.  Just make sure you don't touch the sides without checking to see if its hot!


I didn't spray the pan with nonstick spray first because the brown sugar and butter mixture will keep the cake from sticking.  


All done, waiting to be flipped!


My center cherries shifted a bit, but what can you do?!  No use crying over shifted cherries!


This is a very classic "upside down cake".  You can make this with plenty of different fruit.  Apples, peaches, blueberries just to name a few!  

Enjoy!!  

Wednesday, August 15, 2012

Name cookies


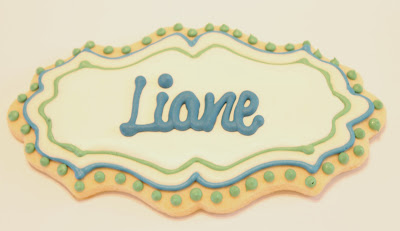
I made these cookies at the beginning of the summer.  It seems I am doing a little "End of Summer" cleaning and finding all these things I wanted to share with you a little while ago and didn't get around to.  Oh well, better late than never!  


These cookies were for my Mother in law and some of her coworkers.  She works at a school, and these were their colors.  Each one is a little different and unique.

I really am into finding fun and different fonts online and then using them on my cookies!  It makes it that much nicer than my normal handwriting (or my "pipe writing").  I like this website called the Font Pool.  They have SO many different fonts to choose from!

You can type in a sample word and then click on all the different fonts to see your word hundreds of different ways.  


I packaged them all up and sent them to school to be passed out.  It's like I am a Mom and making cookies for my kid to take to school for their friends.  Nope, just for my Mother in law.


I hoped you enjoyed seeing some cookies I made recently.  I haven't been making cookies as much as I used to, especially with it being summer.  I like making them more when its cool and I want to be inside all day.  

I know I am probably early to say this, but I always look forward to fall towards the end of summer.  I love summer, but I don't like the extreme heat so when it starts to cool down I am always happy.  I can't wait to wear a pair of jeans again!! 

Anyways... I won't wish away the last few weeks/month of summer and the beautiful weather just yet.  ;-)  

Saturday, August 11, 2012

Chocolate Chip Banana Muffins


It's almost the middle of August here and I am wondering where this summer went!  I haven't been on here much because I am have busy traveling and visiting with people.  We are also in the middle of redoing our kitchen, so that makes it hard to do much baking!!  We keep changing our mind on how we want to do the kitchen, so things are everywhere!  One of the counter tops is even ripped off and leaning against the wall.  What a mess!  So hopefully the wheels will start turning on the remodel and I will be back to baking soon enough!  

But for now, here are some yummy muffins I made a little while back and forgot to put on here!  I recently got some of these fun little baking cups (my design is different because I found them at a little store near me, but The TomKat Studio sells them online!).  I wanted to see the difference between normal baking liners and these new baking cups.    


I wouldn't use the baking cups for everyday use and all the time, because they are more expensive, but they kept the muffins extra moist and none of the muffin stuck to the cup when I peeled it away.  You know how  when you use some muffin liners, a little of the muffin sticks to the paper and you don't really eat that (unless of course you try to eat it by scraping it off the paper with your teeth, which I would not recommend!).  


The baking cups are nice because you don't need a muffin tin to bake them in.  Simply place the cups on a sheet pan and you can fit more in, since they can be right next to each other.  Also, they are just extra special and cute, so they would be great for a party when you want those extra details.  


Banana Chocolate Chip Muffins
adapted from Food Network recipe

Ingredients:
  • 2 1/2 cups flour
  • 1/2 tsp. baking soda
  • 3/4 cup light brown sugar
  • 3 medium bananas, mashed
  • 1/2 cup vegetable oil
  • 1/2 cup milk
  • 2 eggs
  • 1/4 tsp. salt
  • 2 tsp. vanilla 
  • 3/4 cup chocolate chips
Directions:
  1. Preheat oven to 425°.  Line 12 muffin cups with liners.  *You may get a couple more than 12*
  2. In large bowl, mix the dry ingredients together: flour, baking soda, brown sugar and salt.
  3. Add bananas, eggs, oil, milk and vanilla.  Mix until just combined.  **Do not use mix**
  4. Stir in the chocolate chips.  
  5. Fill the muffin tins with batter.  When you put the muffins in the oven, turn the temperature down to 375° and bake for 20-25 minutes, or until golden brown and a knife comes out clean.
  6. Cool muffins and serve warm or room temperature.  


To remove the muffin from the baking cup, simply tear the paper cup away from muffin gently.  It should come off nice and clean!


Is it me or does mine kind of look like a sad face in the middle with the chocolate chips?!  Haha... just wanted to share!  


Enjoy!